")
Our Comprehensive Guide to Siding Installation on a Residential Properties
When it comes to home improvement projects, siding installation is one of the most significant investments a homeowner can make. Proper siding enhances a house’s curb appeal, improves energy efficiency, and protects against weather elements. Whether you’re considering a DIY project or hiring a professional, understanding the siding installation process is essential.

Choosing the Right Siding Material For Your House
The first step in siding installation is selecting the right material for your home. We work with all homeowners to ensure that they can choose the best option for their style and budget. Below are some of the siding installations we offer:
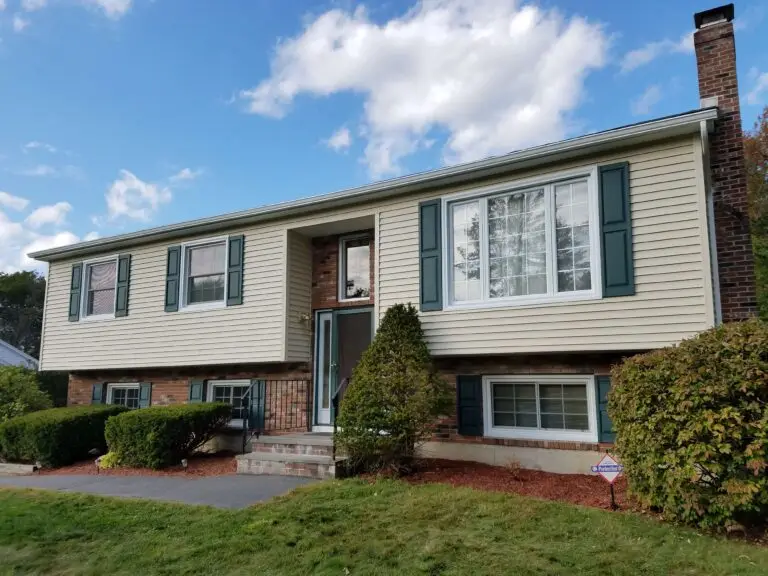
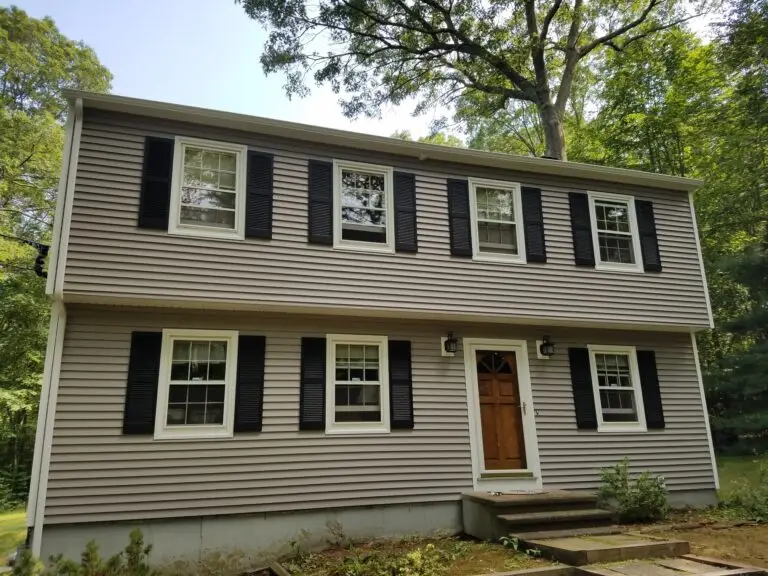
Vinyl Siding: It is the most popular option for a house. Affordable, durable, and available in a variety of colors and styles that mimic the look of natural wood. It is a low maintenance product that can use soft power washing every now and then if necessary.
Wood Siding: Offers a natural and traditional look but requires regular maintenance. It Come in different styles, profiles and textures, including shingles, lap siding or board and batten It can be painted or stained to match your desired home style . Wood siding provides natural insulation that may help to reduce energy cost on long term.
Fiber Cement Siding: Its is durable product that can resist most weather elements, fire, insects damage, and rot while mimicking wood appearance. Comes pre finished in many colors and styles to choose from. Very Little maintenance is needed if properly installed.
Metal Siding: Lightweight, rust resistant and virtually maintenance free. It’s good for insulating homes cause it reflects heat which helps to maintain indoor temperatures. Metal siding does not absorb moisture which reduces the growth of mold, water and insect damage to house substrates.
Stone Veneer: Provides a timeless and elegant appearance with high-end look that mimics real stone. It has excellent durability, t is resistant to fire and all weather conditions. It is more affordable then traditional stone masonry. It is available in various colors, textures to fit any homeowner style.
Preparation for Siding Installation
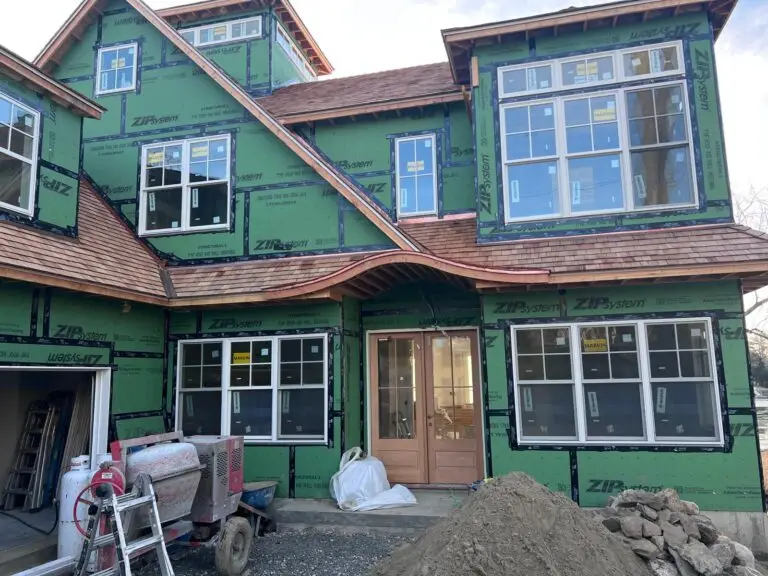
Preparation for Siding Installation
Before beginning installation, 4 steps need to be taken for smooth installation:
Inspect the Exterior: Ensure the wall sheathing is intact and free from mold or damage.
Remove Old Siding: Carefully remove any existing siding, repairing any underlying issues.
Install a Weather Barrier: Apply house wrap or felt paper to protect against moisture and improve insulation.
Check for Structural Integrity: Replace any rotted or damaged wood before proceeding.
.
Steps We Are Taking to Ensure Proper Siding Installation
1. Measure and Cut Siding Panels
Accurate measurements are essential for ensuring a seamless look. We always use laser level and chalk lines to maintain straight alignment around the house.
2. Installing the Starter Strip
The starter strip is the foundation for the siding panels. It should be positioned correctly to ensure the first row of siding is level. Vinyl siding, for instance, needs a different starter strip than wood siding does. It’s important to follow the manufacturer’s guidelines to ensure proper installation and longevity of the siding Vinyl siding starter strip is usually made from aluminum. Fiber cement is made of the same material as siding. Metal siding starter depends on the application and is usually a snap on starter or a J Pocket that siding fit inside of.
3. Begin Attaching Siding Panels
Starting from the bottom and working the way up our siding crew always make sure new siding is fastened good.
We always use fasteners that are recommended for the specific siding type. For Vinyl siding we are commonly using galvanized nails. For all other types of siding we install we always use stainless steel fasteners to get the most longevity of the product we install.
Our crew always make sure to allow room for expansion and contraction, especially for vinyl siding.
4. Install Trim and Finishing Touches
Different types of siding require specific trim installation.
Vinyl Siding Trim options
- J-Channel Trim – Used around windows, doors, and soffits to hold siding edges.
- Starter Strip – Installed at the base to secure the first row of siding.
- Corner Posts – Used to provide a finished look at inside and outside corners.
- Fascia & Soffit Trim – Protects roof edges and improves ventilation.
- Casing Trim – Installed around doors and windows for a clean, finished look.
Wood Siding Trim
- Wood Corner Trim – Provides a seamless transition between siding panels or shakes at corners.
- Decorative Trim – Can be crafted into various styles for a custom look.
- Fascia & Soffits – Typically made from the same wood species as siding for uniformity or PVC material.
- Brick Molding – Used around doors and windows for added protection and aesthetics. Can be wood or PVC.
- Batten Strips – Used in board-and-batten styles to create vertical accents.
Fiber Cement Siding Trim
- Fiber Cement Trim Boards – Durable and moisture-resistant for corners, windows, and fascia.
- PVC or Composite Trim – Commonly paired for low-maintenance finishing.
- Metal Trim – Used in modern applications for sleek, contemporary edges.
- Flashing Trim – Helps direct water away from vulnerable joints
Metal Siding Trim
- J-Channel Trim – Covers cut siding edges for a neat finish.
- Corner Caps – Protects and finishes exposed corners.
- Drip Edge Trim – Directs water away to prevent leaks and moisture damage.
- Fascia & Soffit Trim – Usually aluminum or steel to match metal siding durability.
- Casing Trim – Provides a clean frame around doors and windows.
Stone Veneer Siding Trim
- Stone Veneer Corners – Prefabricated corners that blend seamlessly with siding.
- Ledge Trim – Used for decorative transitions between stone veneer and other materials.
- Keystone & Header Trim – Decorative elements around doors and windows.
- Metal or Composite Trim – Often used to cap edges for a polished look.
The right trim selection depends on both aesthetics and functional needs. Whether using wood, vinyl, fiber cement, metal, or stone veneer, matching trim ensures a polished, long-lasting siding installation.
5. Performing Final Inspection
- We always perform final inspection with all of our customers to ensure we delivered the best possible siding installation. We make necessary adjustments to ensure a flawless finish and satisfied homeowners at every project. Most manufacturers offer warranties for siding. If the final inspection is not completed properly, it could affect warranty coverage in case of future issues. This is very important task to ensure maximum longevity and coverage of newly installed product.
Maintaining Your Siding
Once installed, proper maintenance will prolong the life of your siding:
Clean annually with a pressure washer or mild detergent.
Inspect for cracks, warping, or loose panels.
Check for openings trim damage and if there are gaps or cracks that need fixing.
Repaint or reseal wood siding as needed.
Check for pest infestations, particularly with wood siding.
.
Summary
Siding installation is a valuable home improvement project that enhances both aesthetics and functionality. Whether opting for a DIY approach or hiring professionals, careful planning and execution ensure long-lasting results. By choosing the right material and maintaining it properly, your home’s exterior will remain beautiful and durable for years to come.
Need expert advice or installation? Contact us as your professional siding contractor to get started on your home improvement journey today!